
One of my favorite products that I created is a DNA bundle (click here to find on TPT to buy) that includes
- teacher notes
- student notes
- PowerPoint
- Interactive notebook activities (or can be used just as worksheets)
- Homework
- Quiz
I’ve included pictures of the interactive notebook activities from this bundle. You don’t have to have an interactive notebook to use these activities/worksheets. You can give them as individual worksheets as your students progress through the topic. You can see in the pictures that I did put them in a interactive notebook.

If you look at the worksheet on the LEFT ABOVE , you will see that I actually drew 3 DNA molecules I decided to do this because I am a visual learner. I noticed that many worksheets had students practice complementary base pairing by writing that T-A and G-C but didn’t show it in a DNA molecule. I wanted to visually see it to help me process it and I knew it would help my students as well.
The worksheet on the RIGHT ABOVE takes students a little more in depth. Students learn how nucleotides form the basic unit of DNA. Here students have to define what a nucleotide is and be able to identify one in a DNA molecule. It also goes over some rules to follow to know how to properly place the phosphate, deoxyribose sugar, and nitrogen base in a nucleotide.
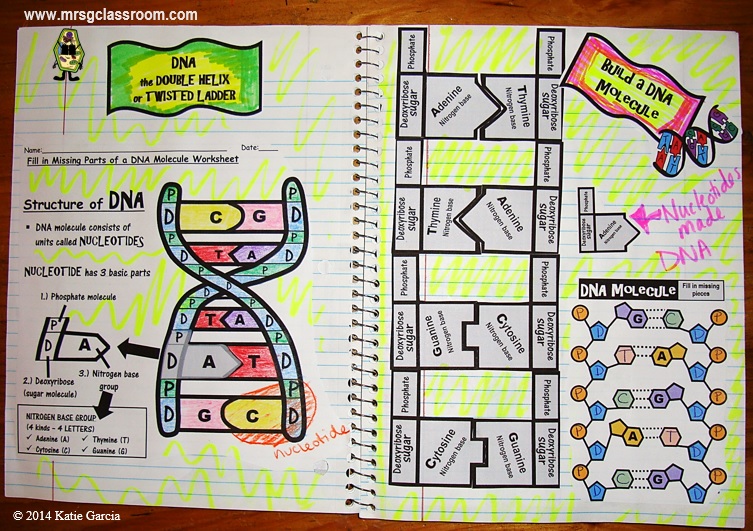
The next worksheet you see above on the LEFT has students color one nucleotide, identify the backbone of DNA, and then color the different nitrogen bases. This just helps students reinforce the components of a DNA molecule. This activity would be great as a QUICK warmup after students have completed the Nucleotide Worksheet that I posted before this picture. It uses terms like “backbone” to help your students remember that the backbone of a DNA molecule is sugar and phosphate. I also made the DNA molecule in this picture twisted so you could show your students why DNA is often referred to as a double helix or twisted ladder.
In the picture above on the RIGHT, you will see I created nucleotide pieces that your students have to cut out and arrange properly to make a DNA molecule. In my class, sometimes I don’t even have my students cut out the pieces. I might have them already printed on cardstock, pre-cut, and in bags. You could laminate the pieces to use year after year. I just print everything on cardstock now because it is heavier and not as easily to bend or become ripped. I usually can use these pieces for a couple of years. I use to laminate everything but it takes up too much time. I have too many students. Next I will distribute the bags to my students (which are grouped in pairs) and ask them to create a DNA molecule. Then I walk around and check to see if students can properly create a DNA molecule. I will also ask students to point to the basic unit of DNA. You would be surprised how many students point to a nitrogen base instead of one of the puzzle pieces (each puzzle piece is a nucleotide and that is the basic unit of DNA – so they should pick up 1 puzzle piece). This is a fast way to check for understanding and clear up any misunderstandings. I do offer the “Build a DNA Molecule” separately on my TPT store but the shapes of the nucleotides are a little bit different than in this bundle. So please look at the images on TPT carefully before you buy and read the reviews. To just see this individual item on TPT for sell, click here.
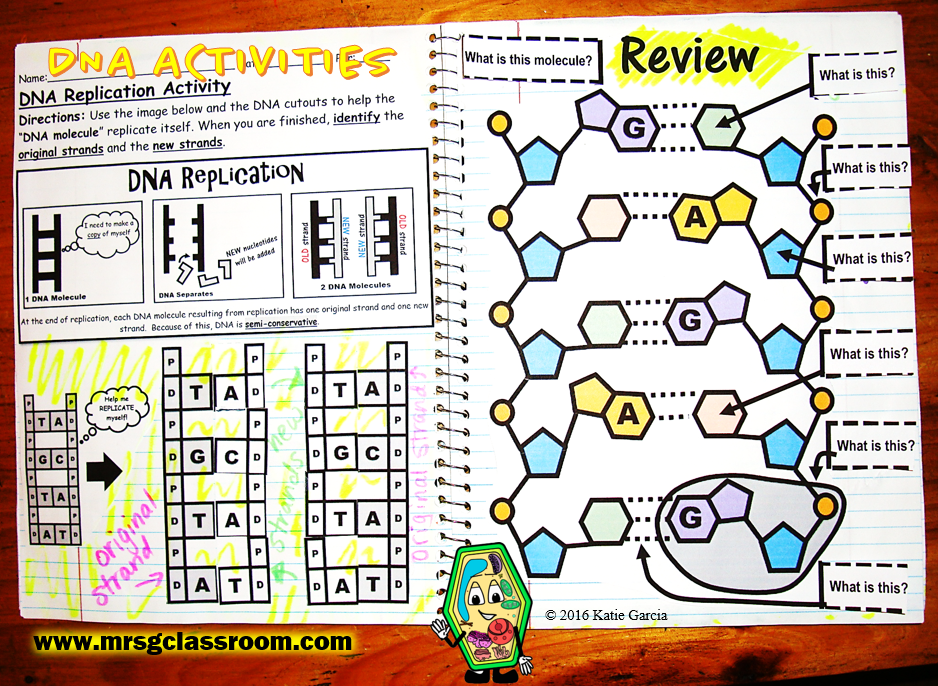
The next worksheet above on the left helps students understand how a DNA molecule replicates. Often, I see teachers just show their students a picture of how this process works but doesn’t physically have their students re-enact the steps. So I created this worksheet where students start with 1 DNA molecule and they have to help the molecule replicate.
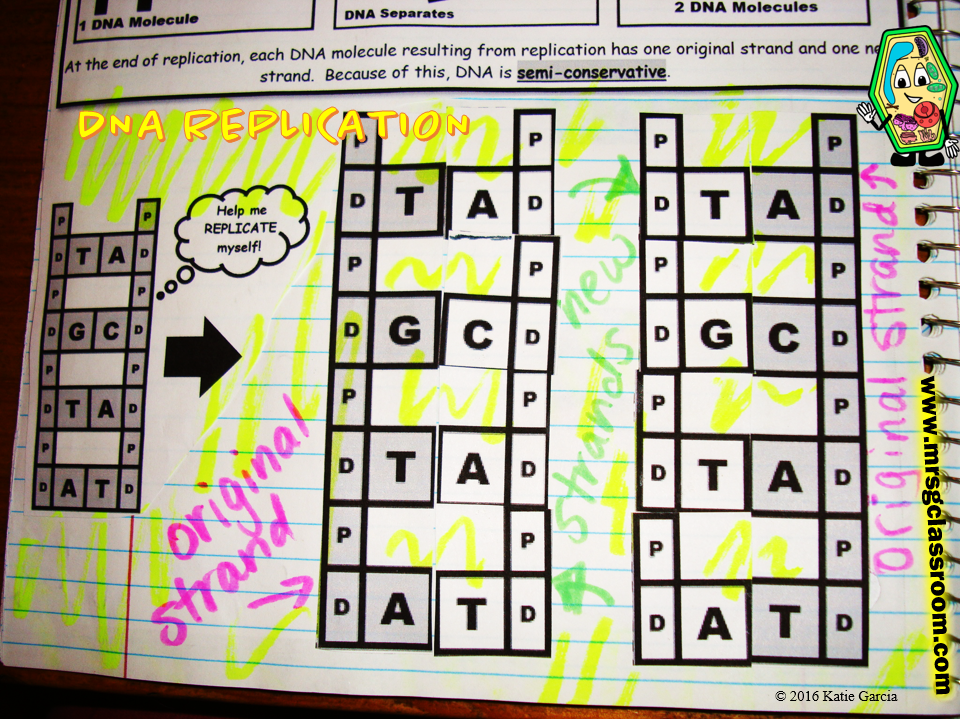
(IMAGE ABOVE) Here is another close up shot of the same activity. Students had to look at the DNA molecule on the left and had to replicate it. They were given the DNA molecule and additional nucleotides. Using scissors, students had to cut open the DNA molecule and placed the original strands on the far left and right. Then cut out the new nucleotide pieces and place them according to the complementary base pairing on the original strands. This resulted in DNA replication. I would recommend having students label the original strands in one color, and then label the new strands in another color. Then I would have students write how many DNA molecules we started with, and how many we finished with (so we started with the 1 DNA molecule on the left, and after replication, we now have 2 DNA molecules on the right –> thus DNA replication happened!). If you would just like to buy this individual item, DNA Replication Activity, click here to go to my TPT store.

(IMAGE ABOVE) The next activity I created was a DNA foldable. This foldable has flaps that open up where you students can write in the different parts of a DNA molecule and use this foldable as a tool to study with or quiz other students. I also made sure that this DNA molecule took students knowledge to the next step. It really showed students what a DNA molecule’s parts actually looked like. If you would like to just purchase this DNA Foldable separately, click here to go to my TPT store.
If you would like to purchase the entire DNA bundle with all of these activities including PPT notes, homework, and quiz, click here to go to my TPT with the Bundle https://www.teacherspayteachers.com/Product/DNA-Deoxyribonucleic-Acid-Notes-PowerPoint-Activities-1818918
