
Cellular Respiration is one of the hardest processes for students to learn. That’s why I created this great activity that helps students practice the steps.
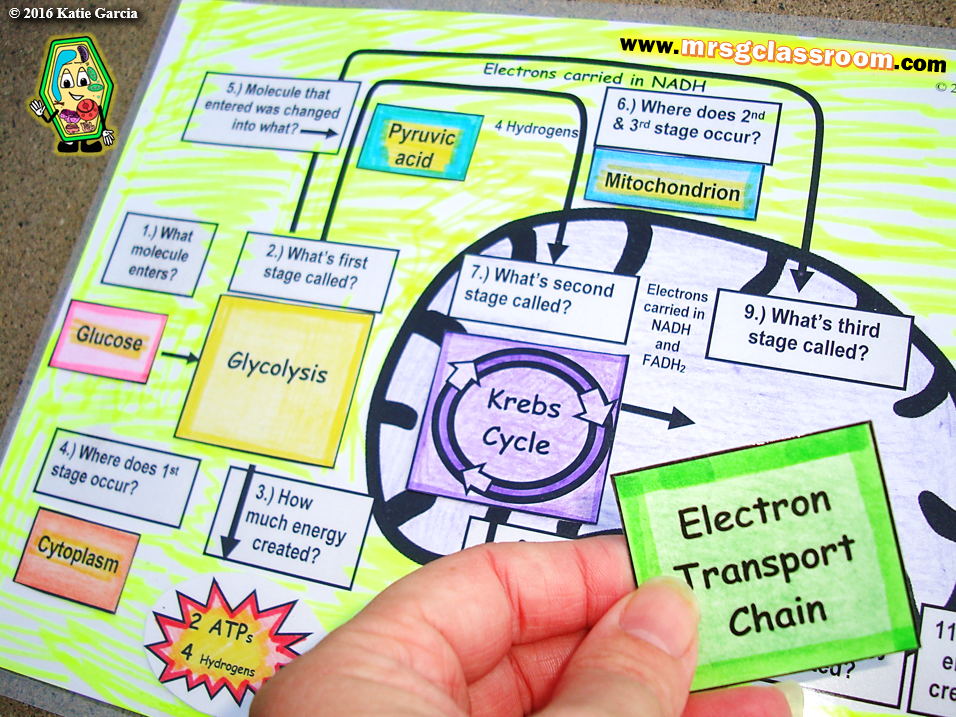
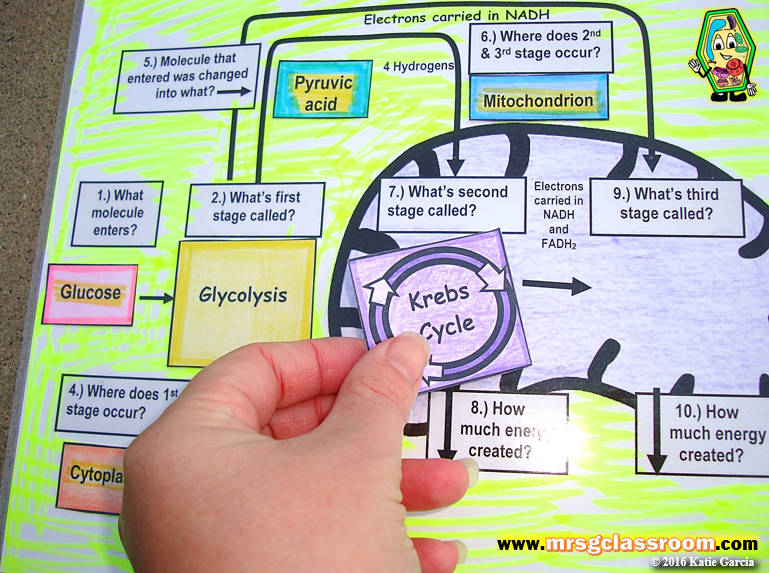
When I do this activity, I have students work in pairs. One student is responsible for laying down the pieces while the other student is responsible for reading the questions and checking his/her partner’s answers using the answer key. Let me show you what I mean. Refer to the IMAGE ABOVE when reading the example below.
For example,
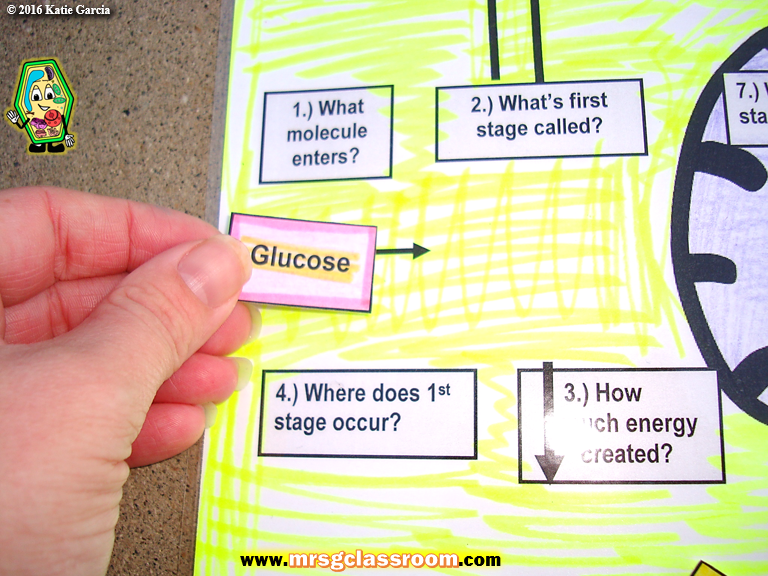
Student 1 – Okay. Question # 1 asks what molecule enters?
**Student 2 picks up the glucose term and starts to place it below question # 1.
Student 2 – Um. I think the glucose molecule enters.
**Student 1 checks the answer key.
Student 1 – Yes! You are right man!
Student 2 – Yessssss!!
(IMAGE ABOVE)
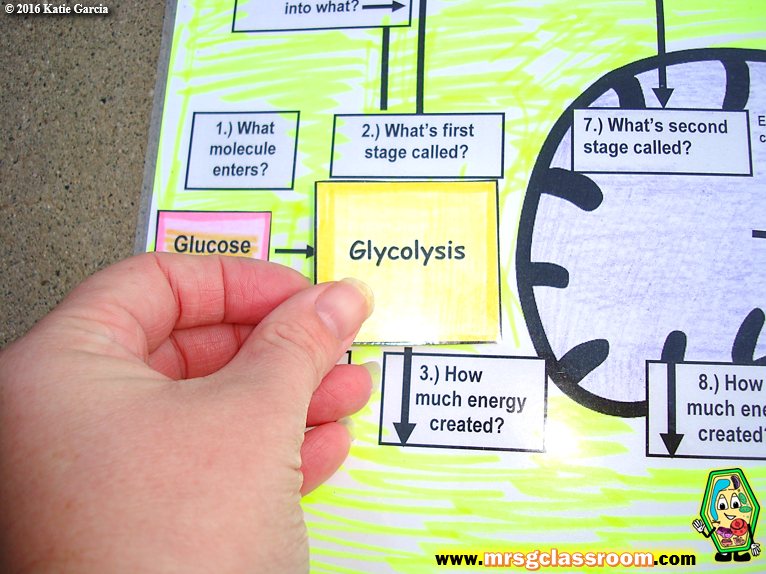
Student 1 – Okay. Next question. Question # 2 asks what’s the first stage called?
**Student 2 grabs the Glycolysis term and starts to place it under question # 2.
Student 2 – I think the first stage is called GLYCOLYSIS.
**Student 1 checks the answer key.
Student 1 – Yes!! You are correct again!
(IMAGE ABOVE)
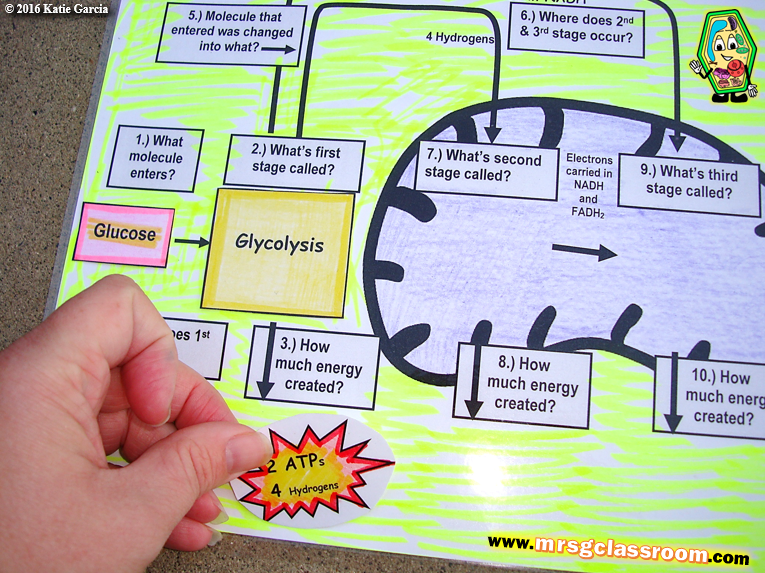
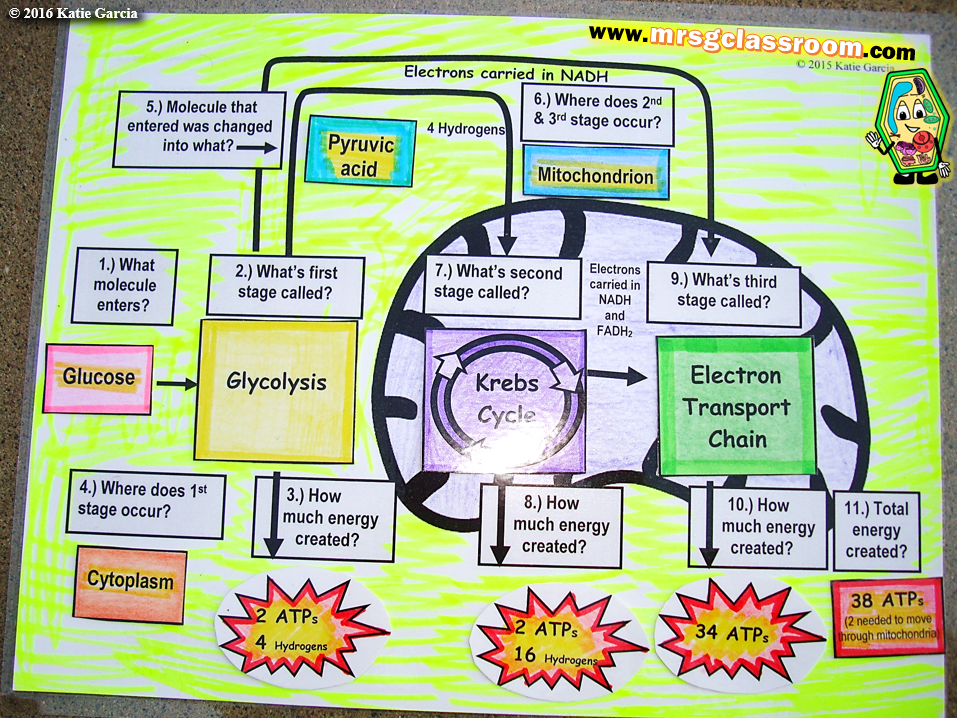
Student 1 – Okay…. Question # 3… How much energy is created?
**Student 2 picks up the 2 ATPS & 4 Hydrogens piece and places it under question # 3.
Student 2 – I got this one! It’s 2 ATPs & 4 Hydrogens!
**Student 1 checks answer key.
Student 1 – YES! Are you so awesome?
Students would continue the activity until they get through all of the questions.

(IMAGE ABOVE) You can see the pink cardstock sheet is the ANSWER KEY. Student 1 would have this sheet to check Student 2’s work. I wanted to show you guys that you don’t have to have the students color in the activity like mine was. I have a lot of students and not a lot of time. So usually I just print the worksheets & terms (the pieces) on cardstock (usually different colors). Then I cut out the terms (or pieces) and place them into a plastic bag. Each pair of students receives a plastic bag and the two sheets (1 answer key & the blank board). I use to laminate everything but it takes to long. Cardstock is pretty strong and I can use this activity over and over again. I have had mine for about 3 years.
You could have your students place the blank board (with just questions & no answers yet) in a interactive notebook. Then glue in a envelope on the next page and have your students keep the puzzle pieces in there so they could practice by themselves. There are so many ideas that you could do with this interactive activity.
You can buy this activity on my TPT store by clicking here.
